Before-and-after photos are the most persuasive marketing asset a dental practice can create. They offer undeniable visual proof of your clinical skill and directly address the question every cosmetic patient asks: "What will my results look like?" Done well, they convert browsers into booked consultations. Done poorly — or without proper consent — they can expose your practice to significant legal risk.
This guide covers both sides: how to capture and present photos that drive patient decisions, and how to stay fully compliant with HIPAA and state regulations throughout the process.
Why Before-and-After Photos Convert
The psychology behind before-and-after photos is straightforward: they reduce uncertainty. When a patient considers veneers, whitening, or implants, their biggest fear is not knowing what the outcome will look like. Written descriptions and verbal reassurances can only go so far. A gallery of real patient transformations provides the visual evidence that tips decisions from "I'm interested" to "I'm ready to schedule."
Research supports this. A 2025 study published in BMC Oral Health surveyed 552 patients and found that dental photography shared on social media significantly influences patients' selection of dentists and type of treatment, with the effect being strongest among women and Instagram users.
Before-and-after photos also serve as portfolio pieces that demonstrate your range. A gallery showing diverse cases — different ages, skin tones, dental conditions, and treatment types — tells prospective patients that you have experience with cases similar to theirs.
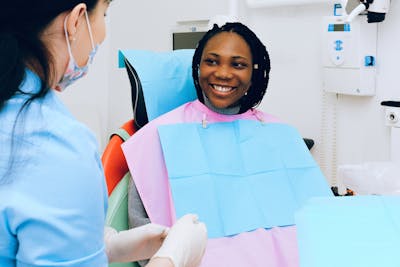
Photography Standards and Setup
Clinical photography for marketing purposes requires more consistency than casual snapshots. Patients will compare your before and after images side by side, and any inconsistency in lighting, angle, or background undermines credibility.
Essential Equipment
- Camera: A DSLR with a macro lens produces the best results, but a recent smartphone (iPhone 14+ or Samsung Galaxy S24+) with a ring light is acceptable for social media use.
- Ring flash or ring light: Even, shadow-free illumination is critical for intraoral photography. A dental-specific ring flash attaches to your camera and provides consistent lighting regardless of the operatory setup.
- Cheek retractors: Provide clear views of the teeth without fingers or lips obstructing the frame.
- Contrasters: Black backgrounds placed behind the teeth create clean, professional images that isolate the dental work.
- Mirrors: Occlusal and buccal mirrors allow you to capture angles that are otherwise impossible.
Standardized Photo Series
For each case, capture a consistent set of views:
- Full-face smile (relaxed, natural)
- Full-face retracted (showing all teeth)
- Close-up anterior view (retracted)
- Right lateral view
- Left lateral view
- Upper occlusal view
- Lower occlusal view
Taking the same views for every case ensures your before and after images are directly comparable. Train your team to follow this protocol for every cosmetic case, even if you are not sure you will use the photos for marketing. It is far easier to capture the images at the time of treatment than to recreate them later.
Photograph every cosmetic case with standardized views and proper consent. Build your library now — you will be grateful in 12 months when you have a diverse portfolio of transformations to draw from.
Consent and HIPAA Compliance
Before-and-after photos are considered protected health information (PHI) under HIPAA. Using them without proper authorization is a violation that can result in fines ranging from $10,000 to over $100,000 per incident.
Required Elements of a Photo Release
- Specific description of the photos/images to be used
- Purpose of use (website, social media, print materials, advertising)
- Whether the patient's name or other identifying information will be included
- Duration of the authorization (specific date or "until revoked")
- Statement that the patient can revoke authorization at any time
- Statement that authorization is voluntary and will not affect treatment
- Patient signature and date
Best Practices for Consent
Present the photo release as a separate document from your general treatment consent. Do not bundle it into your new patient paperwork where it might be signed without review. Explain to the patient exactly how their photos will be used, show them examples of how other patient photos appear on your website or social media, and give them time to decide.
Some practices offer a small incentive (credit toward future treatment, small gift card) in exchange for photo authorization. This is generally permissible, but check your state dental board's guidelines on patient incentives.
Presenting Photos for Maximum Impact
How you present your before-and-after photos matters as much as the photos themselves. Here are the principles that maximize conversion.
Side-by-Side Layout
Always present before and after images side by side, with the "before" on the left and "after" on the right. Use consistent sizing and alignment. Label each image clearly. This layout is universally understood and requires no explanation.
Context and Storytelling
Accompany each case with a brief narrative: What was the patient's concern? What treatment was performed? How long did it take? What was the patient's reaction? This context transforms a pair of clinical photos into a compelling story that prospective patients can relate to.
Diversity in Your Gallery
Curate your gallery to represent the diversity of your patient base. Include different ages, genders, ethnicities, and dental conditions. When a prospective patient sees someone who looks like them with a similar concern, the connection is immediate and powerful.
Organize by Treatment Type
If you offer multiple cosmetic services, organize your gallery by treatment type: veneers, whitening, implants, orthodontics, smile makeovers. This allows patients researching a specific procedure to find relevant examples quickly.
Dentplicity's competitive analysis shows how your online presence compares to local competitors, and DentGPT helps you write compelling captions and descriptions for your transformation photos. Get started free →
Where to Use Your Photos
Your before-and-after photos should work across multiple channels, each serving a different stage of the patient journey.
Website Gallery
Create a dedicated "Smile Gallery" or "Before and After" page on your website. This is often the most-visited page on cosmetic dental websites. Include filtering by treatment type and use a lightbox for full-size viewing. Ensure the page loads quickly — compress images without sacrificing quality.
Google Business Profile
Upload your best transformation photos to your GBP photo section. These appear in local search results and can influence click-through rates. Google allows business-uploaded photos alongside patient-submitted ones.
Social Media
Before-and-after reveals are among the highest-performing content types on Instagram, TikTok, and Facebook. Use the swipe or transition effect for dramatic reveals. Always include relevant hashtags and a call to action ("Book a consultation to start your transformation").
Paid Advertising
Before-and-after images are highly effective in Facebook and Instagram ads targeting cosmetic dental keywords. However, be aware that both platforms have policies regarding before-and-after images in ads — they may reject images that are deemed to promote negative self-perception. Present your photos positively, focusing on the patient's happiness rather than the "problem" that was fixed.
Consultation Room
Display printed before-and-after photos in your consultation room. When discussing treatment options with patients in person, being able to show similar cases builds confidence and facilitates treatment acceptance.
Common Mistakes to Avoid
- Inconsistent lighting or angles: If the before photo is taken under fluorescent light and the after is taken with a ring flash, the comparison is misleading and patients will notice.
- Over-editing: Do not apply filters, whiten teeth digitally, or use photo editing to enhance results. This is both unethical and counterproductive — patients will see the real results in person.
- Only showing dramatic cases: Not every case needs to be a full-mouth reconstruction. Subtle improvements (a single crown, minor whitening) resonate with patients who have minor concerns and might not identify with extreme transformations.
- Missing consent: Never assume verbal permission is sufficient. Always obtain written, signed authorization before using any patient images in marketing.
- Forgetting to photograph: The biggest mistake is simply forgetting to take the before photos. Once treatment begins, the opportunity is lost. Build photography into your clinical workflow for every cosmetic case.
Frequently Asked Questions
Can I use before-and-after photos without showing the patient's face?
Yes, and this is actually the recommended approach for most cases. Close-up intraoral photos showing only the teeth and surrounding tissue are sufficient for demonstrating clinical results and do not reveal the patient's identity. However, for smile makeover cases where the full impact is best seen in a full-face smile, you will need explicit consent for identifiable photos. Some patients are happy to be featured; others prefer anonymity. Offer both options in your consent form.
What if a patient revokes their photo consent after I have already published the images?
You must remove the photos from all channels as promptly as possible. This includes your website, social media accounts, printed materials, and any third-party sites where you have control. Document the removal process and the dates each image was taken down. This is why it is important to maintain an organized system tracking where each patient's images are published — so you can act quickly if consent is revoked.
How many before-and-after cases should I have in my gallery?
Quality matters more than quantity. Start with your 10-15 best cases that represent your most common procedures and a range of patient demographics. A gallery of 10 excellent cases with consistent photography and compelling narratives is more effective than 50 poorly photographed or poorly presented cases. Aim to add 2-4 new cases per month as you build your library.
Should I include the treatment cost in my before-and-after posts?
This depends on your marketing strategy and state regulations. Including a general price range ("Veneers starting at $X per tooth") can pre-qualify patients and reduce consultations with price-shoppers. However, it can also deter patients who might have proceeded after learning about financing options. Many practices prefer to include "Schedule a free consultation" as their call to action, discussing pricing in person where they can present financing options alongside the cost.
Ready to see how your practice's online presence compares?
Try it free →